As a person who makes their own bread, I’ve got a few recipes that have always worked wonderfully for me throughout the years.
That is, until now. Or should I say up until a few months ago.
Actually, I really shouldn’t blame it on the recipes… maybe I should blame it on the yeast. On second thought, that really isn’t fair because I can’t really pin it on any one thing that is causing me such frustration with producing less-than glorious loaves of bread. Mainly wheat bread, which is the staple in our house.
There are many factors that can cause such catastrophic problems such as heavy loaves from under-rising. Whole wheat flour is a bugger to work with, and I’ve learned over the years when the best wheat flour is in season (yes, there is a season: winter wheat vs. summer wheat). I always have the best results when I buy my flour in bulk and it is organic. But since we don’t have a store around here anymore that has those qualifications, I’m forced to use bagged stuff off the shelf.
Ummmm…. I think I just found the culprit. Actually, that may only be half of the equation because a good loaf of bread also relies on humidity. Since it is dryer than a bone in our house this time of year humidity is lower than the temperature outside.
Didn’t know that you were gonna have a science lesson today did ya!
But seriously, baking bread has science written all over it. There are so many factors that you have to weigh in order to produce the ideal result. And since none of those factors are in my favor right now, I’m throwing in the towel and going back to my tried and true recipe of making white bread for a while. Oh, there are still those pesky little “equations” that you have to factor in. After all “white” flour is just fine wheat flour, typically bleached, from which most of the bran and germ have been removed.
I know you’re just dying for the recipe, so here goes:
- 1 1/3 cups warm water
- 1 Tbsp butter, softened
- 1 Tbsp white sugar
- 1 Tsp salt
- 3 1/2 cups white flour
- 2 Tbsp dry milk powder
- 1 (.25 ounce) package active dry yeast (or 2 1/4 tsp)
If you use a bread machine to make your bread, place the ingredients in the pan recommended by the manufacturer. If you make all your bread by hand, I applaud you. If you use your stand mixer to do the dirty work, I’m gonna tell you how I process the dough.
With warm water in the mixing bowl, add butter, sugar and milk powder. Next, add your flour, salt and yeast. With dough hook attachment, stir all the ingredients on low/stir for a minute or so to get things mixed up a little. Amp it up to the low/2 setting and set your timer for 5 minutes. Walk away and let the machine do the work. After the 5 minutes is up, remove dough from the mixing bowl and kneed it a couple turns to form in a ball. If your dough appears a little “wet”, put a little flour on your counter and kneed it into the dough for a couple turns until it is not longer sticky. Please, please try not to add too much flour or you’ll get a heavy loaf.
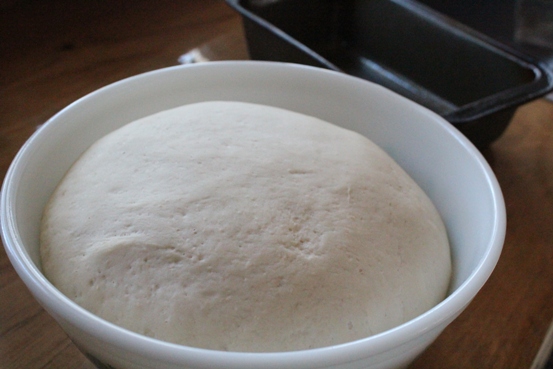
Grease your bowl really good and wipe your dough all around it. Place the bowl in a warm area and cover with a light cloth for 1 to 1 1/4 hours until doubled in size.
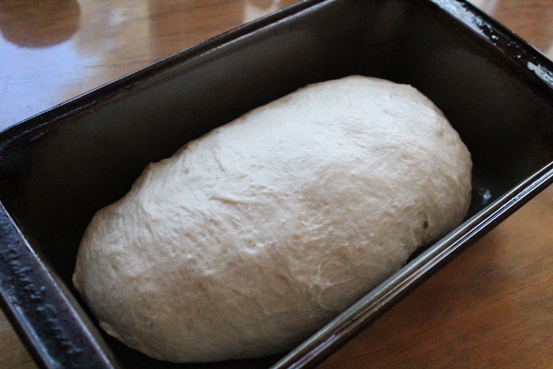
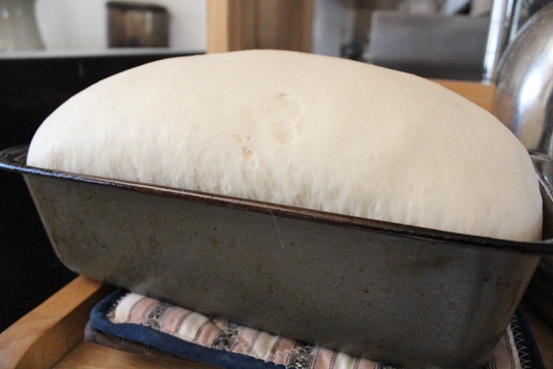
Plop it out of the bowl and kneed a few times to move all that delicious gluten around. Shape into a loaf and place in a greased loaf pan. Cover with a light towel and place in warm area for 45 minutes to one hour, or until doubled in size.
This is the point where I get really excited. See how the dough is a couple of inches past the rim of the pan? THIS is what a good pan of bread dough looks like.
Bake at 350 degrees for 25 to 30 minutes until golden brown and bread sounds hollow when tapped. Immediately remove from pan and cool on wire rack. I like to rub the top with butter while it is still hot so that the top crust isn’t so crunchy, but that is optional.
My mouth is watering just looking at it. There is nothing that compares to the smell of fresh homemade bread. Restraint is necessary at this point because you just want to slice off a big hunk of this bad boy, slather it with butter and eat it all in one sitting. And you could do that (who and I to judge) but it’s best to let it cool completely before slicing it.
Yes, baking your own bread is time consuming, but the rewards are fantastic!
Oh, and wanna know how much it cost to make? $1.40. You can’t buy a decent loaf of bread now-a-days for that price. PLUS, there are no hidden additives or preservatives, unlike that crap stuff on the store shelves that may look pretty but that’s just the wrapping. Taste is where it’s really at.
And believe me, once you taste this bread you’ll realize what you’ve been missing out on.
3 Responses to “Tried and True”
Sorry, the comment form is closed at this time.


Mmmm… *drools*
Thanks for posting your recipe. I’m going to make it right now!
YAY!!